Donoclip is a website that allows viewers to record short messages on the streamer’s donation page, using a microphone or webcam. The clips then go through moderation by the streamer’s trusted appointees, and if approved – they show up on stream.
In this article, we’ll show you how to get your stream set up with voice & video messages.
1. Sign up to Donoclip
First, we’ll need a Donoclip account. Head over to the signup page, type in your Twitch username & email, and create a password.

Once your account is ready, log into the platform.
2. Add source to OBS
Upon logging in, you’ll arrive at your inbox. On the left sidebar, choose “My links”.
The first link on the page is your donation page. We’ll get to that in a moment.
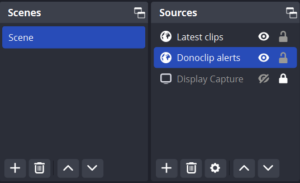
The second link is your web source, also known as a “browser” source. Copy the link and add it as a new source on OBS, XSplit or Streamlabs Desktop.
3. Link to your donation page
Now, let’s grab our donation link, along with your preferred panel image from the bottom of the “My links” page, and add them to your Twitch info section.
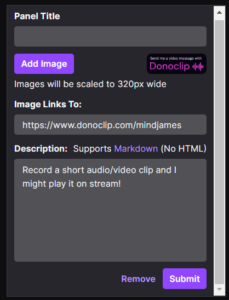
Make sure the image is clearly visible, and links to the right place.
4. Choose your settings
Donoclip is now ready for free clip submissions, but you can also set up paid ones.
First, head over to “Settings” via the sidebar, and under “Donations”, enter your PayPal email. This will allow you to enable paid clips, or a combination of paid and free clips.
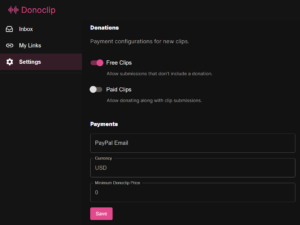
If you go for paid clips only, we recommend a price point of $2, at least on the first couple of streams. You can then adjust it as necessary.
Other than that, if you prefer to get only one type of clip (either voice or video), you can change it here as well. And, if you get too many submissions to handle – you can always turn off your Donoclip page by switching off “Incoming clips” at the top.
5. Managing incoming clips
Now, let’s test it with a clip of our own. With free submissions turned on, go to your own donation link (found in “My links”), and record a voice or video clip.
Once done, go back to your inbox, and click the “Manage clip” icon on the right.
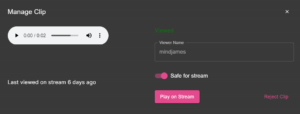
Here, you can control what happens to the clip. With your streaming software on, click “Play on stream”. If you see your clip come up on your canvas, that means you set it up correctly.
It’s recommended to have moderators manage clips while you’re live. To invite mods, go to the settings and choose “Mods” at the top. Create an account for them using their email, and create a new password for them.
Finally, you can have a sound notification whenever a new clip arrives. In the settings, choose “Notifications” at the top, and switch it on. Click preview to find out what it sounds like.
6. Make it visible
Voice & video messages are a new phenomenon on Twitch, and viewers might not be aware of it yet. To encourage viewers to engage with it, consider adding a bot command (like !donoclip) that shares the link with any interested viewers.
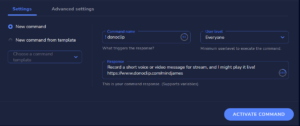
The command may look like this:
Record a short voice or video message for stream, and I might play it live! https://www.donoclip.com/yourname
Once you have a command for it, you can include it in your title, which brings more visibility to it.
For more tips and best practices, see our article: What to do on your first stream with Donoclip.

